
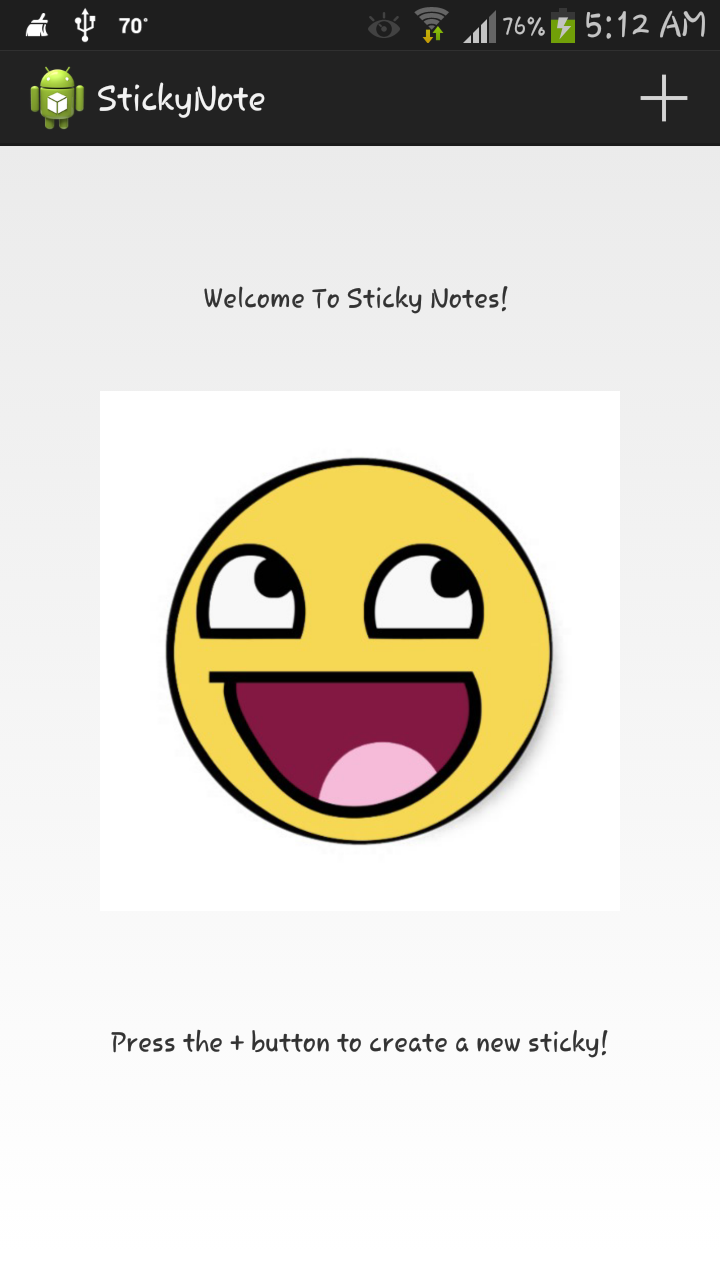
Finally week 2! It’s not easy trying to translate and implement ideas into code especially in Android, but man do I have to say that it was surpassingly easy! Well, the visual aspect of it at least. Since the main focus for week 2 was activities, the action bar and the settings menu, it helped me realize something super important–my app was basically useless. If you recall from week 1, I had a layout where you can create dynamic sticky notes with different colors and write in them, but who wants to have an app that does that? That is exactly what widgets do, and those belong on the home screen. So thinking this way, I came to the conclusion of changing the way my app looks completely and make that 180 degree turn where I can focus more on the user experience rather than content and useless junk. For starters, I used the action bar to display an option where you can click to create a new sticky, added an icon to it and then removed the button in the main layout to make more room. Then, instead of having it create a lot of dynamic stickies I made it so that it only creates one sticky at a time, but the real difference here is that it will cover almost the whole screen and it will have the option to enter a title. Here is the result: 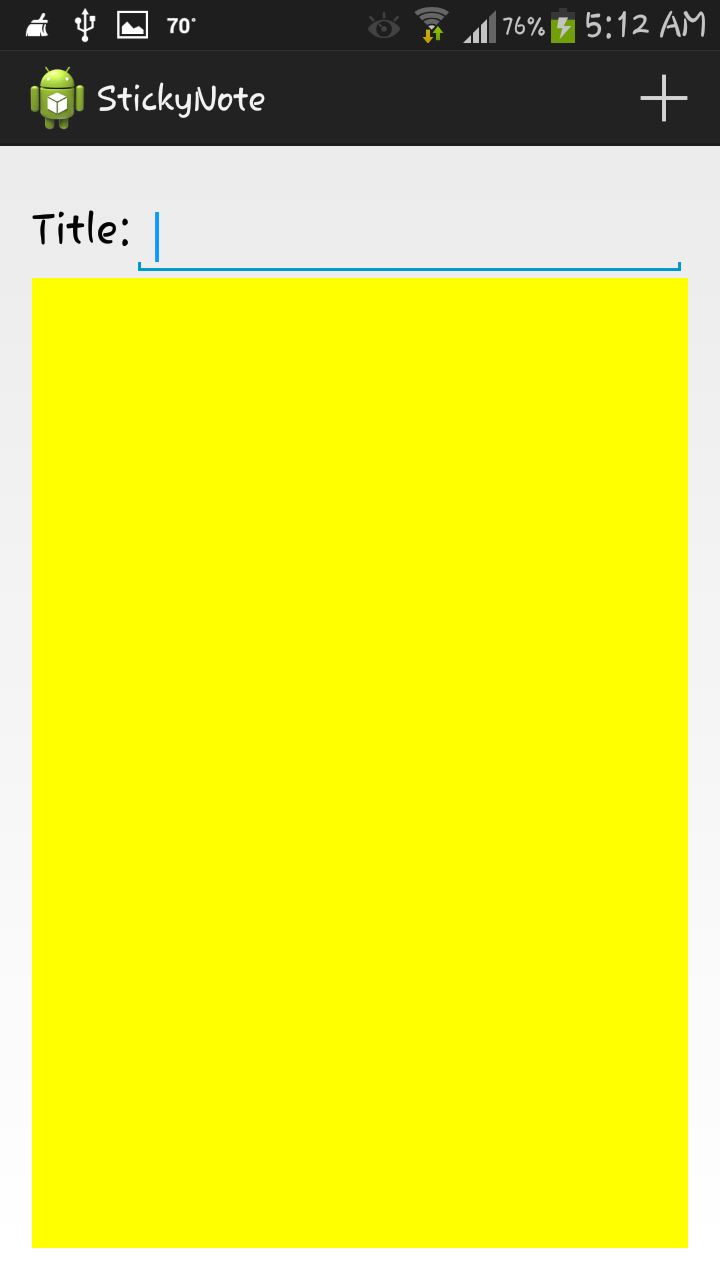 After creating this activity, I had the insane idea of creating a splash screen! Even though it will be useless in this specific app, I thought it will be cool to create and so I did. After having created the splash screen, I noticed that it was using a whole activity for basically nothing so I had to come up with a plan. The plan was to try to come up with a way to reuse the same activity, but try to show two completely different layouts. This then led me to the topic of fragments, but fragments was overkill for what I wanted to implement. After thinking some more, I realized it will be easier to simply remove the layout at runtime as soon as the user clicks on the button to create a new sticky in the action bar. I also added a little welcome message along with a little note that provides simple instructions on how to create a new sticky note. This is how my “splash screen” looks like for now:
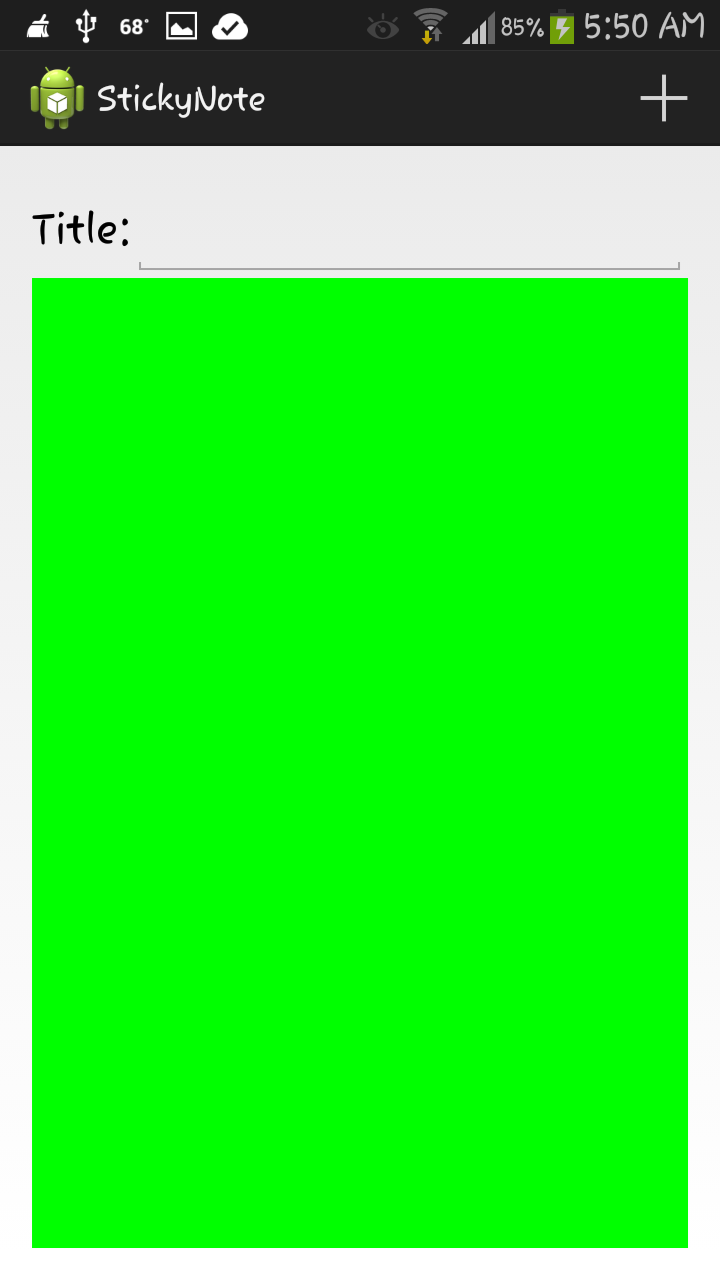
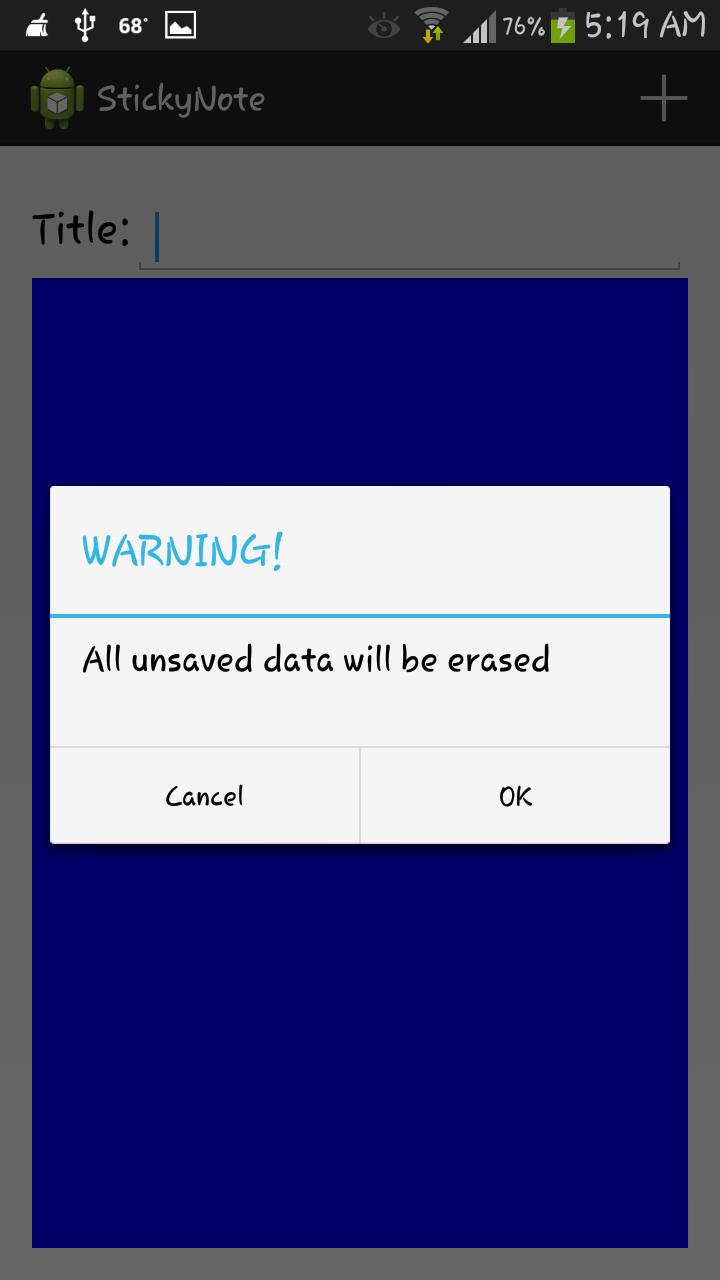
 As soon as the ‘+’ icon is clicked, it will check to see if it is the first time running the app. If it is the first time, then it will delete the “splash screen” and create the original layout dynamically, but if it isn’t it will simply overwrite the existing sticky note with a new one. The problem here is that if the user is typing something that hasn’t been saved yet, they will lose all of their work. To try to fix this I created an alert that will popup with a confirmation dialog where the user can either agree or disagree to the conditions. Here, in order to keep it simple, I just added two buttons: one for “ok”, which is to confirm, and the other to “cancel”, which…well is pretty obvious. If the user clicks “ok”, it will overwrite the current sticky with a new one that will have its background color changed randomly. On the other note, if the user decides to cancel, then it will return to the current sticky note the user was working on. Here are the screenshots:
Everything is working smoothly so far, but the app is still pretty plain. I have to add the functionality to delete, save, edit and even open already saved sticky notes! This will have to be inside some kind of menu, but the question now is: “how”? After spending countless hours searching on the internet and asking in forums, I finally learned the concept behind it and I was able to understand the basics. After messing around with some code in the external libraries that were included in my android studio project, I was able to extend the settings menu. The default menu only had one option, which was “settings”, so I started with that and created a new activity that will be called whenever the user clicks on the settings option. Here is the result:  The next screen is a menu in itself, where it will take you to another activity with different options. I created that option in hope for extending my application in the future. I then created a category called “Notification and reminders” to have options where the user can set up reminders and how frequently they want to be reminded of a specific activity or event. After giving it some thought, the idea of using reminders wasn’t really needed, so I decided to change up the whole entire activity. Here is the newly created settings menu:
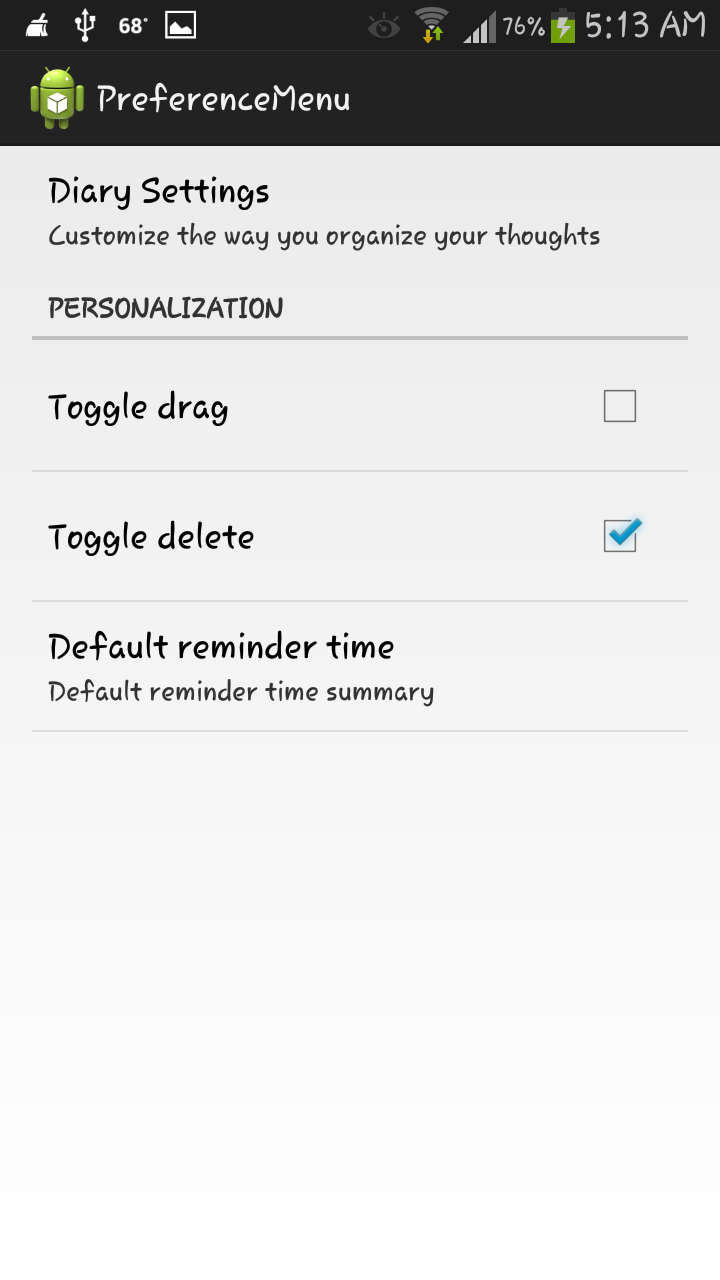 I decided to make the sub menu activity something revolving around the idea of a diary since a diary and sticky notes both involve the action of writing down thoughts and ideas. I also changed the notifications category to personalization. Here, I was hoping to create a building stone for when I decide to create a widget using the toggle drag feature as well as some kind of animation to dynamically create a button on the sticky note itself allowing the user to delete that specific note. After a few trial and errors, I figured that it will be better to toggle some of these features inside the actual menu and not in the settings option; however, I will be leaving the settings menu activity how it is for potential future ideas that may involve it. Putting the settings option aside, the actual menu that shows up whenever the user clicks on the “menu” button, should have the options I said before like: save, edit, delete, open and maybe even a quit button somewhere along those lines. This is where I encountered another troublesome error. According to android, the user cannot have icons next to the actual text of the menu item. This is absurd, especially since i’ve seen many apps using this feature! I didn’t take no for an answer, and continued researching until I found a “hack” to enable to me use this feature. The trick is to use spannable strings and image spans side by side to create the illusion of an icon being displayed next to a menu item. So far my menu looks like this:
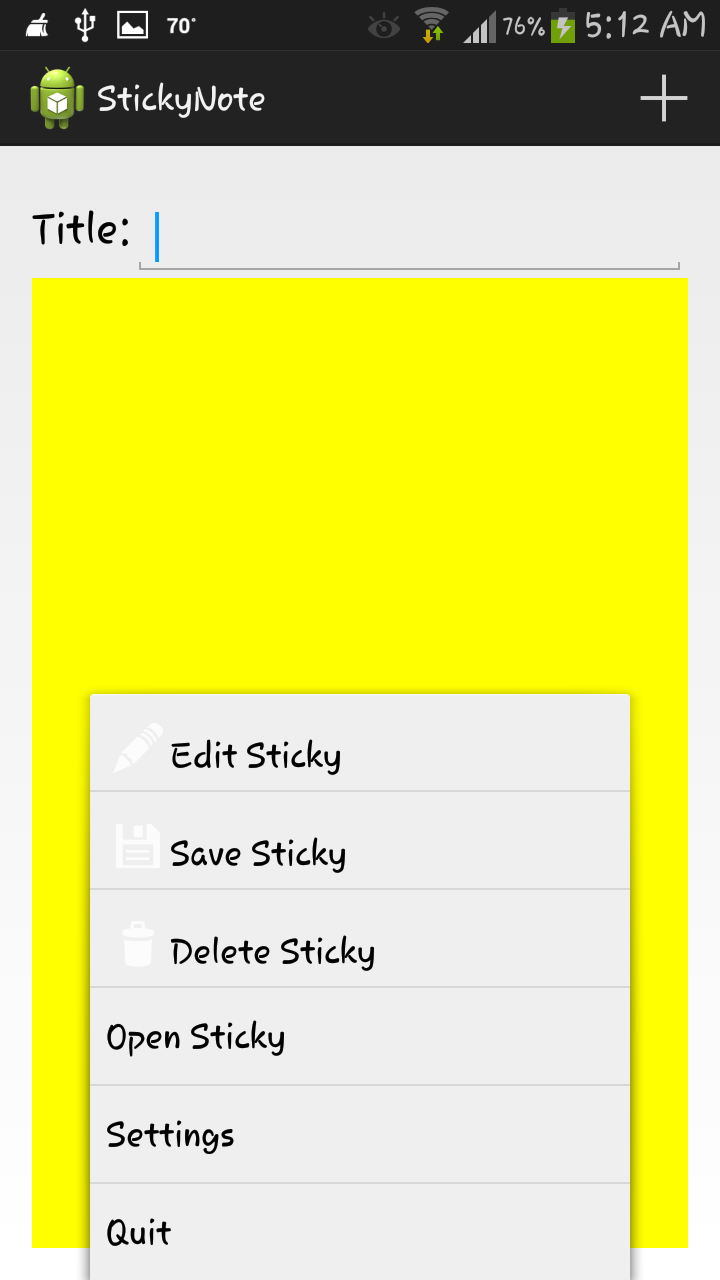
The only thing left is to darken the icons, create more icons for the last three options and actually make the program do something when you click on them! So far, I just have the graphical aspect to it done, but this can all be done in week 3, especially since week 3 is all about data storage! I’ll finally be able to actually open an actual sticky note that has already been saved, and who knows, maybe I can even display it in a list in another activity. Week 3 is sure to be interesting. I can’t wait!