Author Archives: Damian Lajara

Android Week3 HW

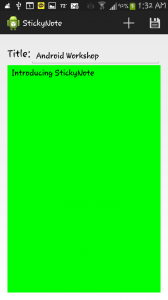
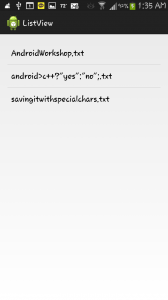
Okay so during the third week, I focused mainly on opening an already saved sticky, but I also worked on refactoring a lot of code, making a camera activity, and displaying icons. Continuing off from where I left from week 2, the first thing I did was move the save button from the menu to the action bar. This made it easier for the user to save instead of having to press the menu button and actually look for it. After moving it the top action bar, I had to actually implement the saving code. After hours of looking at sample code, I was able to figure out the process and make it save the sticky note, but right away I faced two problems. The first problem was that it was saving the contents of the sticky note but not the title. The second problem was that for every new sticky I saved, it was always overwriting the previous one instead of creating a new note. To start off, I had to make sure I was even saving the data to begin with, so instead of debugging the actual file directory, I decided to make a new activity where it will show every file in a list. After creating the list, I saw that there was only one item in the list, and it had a weird name. Once I found out what was causing the file name error, I figured out that I somehow had to link the text view holding the title to the edit text holding the message of the body. After trial and error, I was able to implement a way to save the title along with the message body into one file whose name was  a copy of the title along with its extension of “.txt”.

list viewedit view

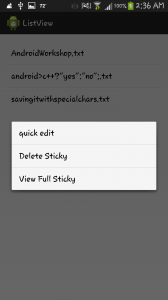
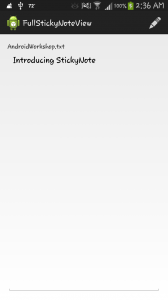
Okay, I finally had the list view working along with the saving, so it was time to add some functionality!  In response to this, I decided to add an activity which just loads the note as well as  a contextual menu to every single list item, which will have the options of editing the name, deleting that individual note and a third option just as a placeholder until future ideas are discovered. The new activity and the quick editing was quite easy, all I had to do was directly access that specific item and change it’s attributes; however, the deleting part was on a whole different level. At first when I deleted an item from the list view, I got extremely happy. I got that feeling of accomplishment when you know you just did something great. The fact that I was able to delete an item from the list view by myself just by poking around with the methods in android, felt amazing…or so I thought. Right after deleting the item I discovered a huge error by accident. Every time I pressed the back button or did anything to change activities and then went back to the list by pressing “open” from the menu, the file I thought I deleted was still there! In the beginning, I thought it was just a glitch, but after re-running the program a few times and repeating the same process, I confirmed that the problem was that I was just REMOVING the file from the list not DELETING the file from the phone’s storage! The deletion process was quite similar to the saving process, so it wasn’t all that difficult, but I didn’t want to take anything for granted.

contextual menufull sticky


After discovering such an error, I decided to run the app on a different android phone. As soon as I pressed the open option and I long pressed on an item to make the contexual menu show up, and it crashed.
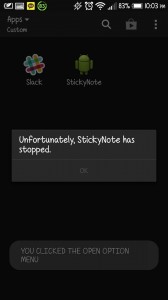
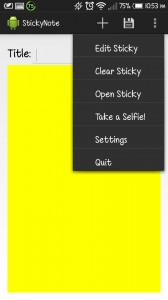
crashAfter seeing how the icons weren’t showing up and putting logs everywhere to debug the program, I figured out the problem. The problem was the icons I had. The way I had my program set up was that I created the icons according to my device every time the menu was pressed, but what I really had to do was move the icons to part of the lifecycle events and then dynamically change the color of the icons depending on the theme. As soon as I did this the error went away and I was finally able to focus on implementing the camera functionality. The hint that led to the solution can be seen in the pic below:
layout problemAfter spending quite some time with the camera and its methods I came to the conclusion that my app really had no use for it, but just for the heck of it, I decided to mess with it a little bit. I already knew that an actual good app gives the option of choosing from the gallery or actually taking a picture, so I decided to do the same. One thing is saying something and another is doing it, but after I read up about it online, I was immediately lost. The code was crazy, the concepts were abstract, vague and hard to understand, and the transition between the camera and the actual activity has to be monitored in different parts of the program since it highly affected by the life cycle events. After realizing that going into all of that was overkill since I really had no use for it in my app, I decided to just try to learn the basics just in case somewhere along the future the necessity of needing to incorporate a camera into my app won’t be tremendously hard. I then started messing around with buttons, image scaling, uri’s and file paths until I had a good understanding of the basics for each concept. The finished product of how I designed this activity can be found below:
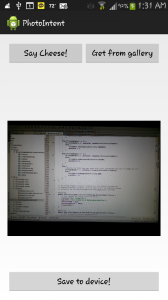
picture intentAnd thats it! That’s all I had time for in week 3. Week 4 will hopefully be about incorporating wifi direct into my app so I can exchange data with other people! This ought to be very interesting.

Mobility First Thoughts

This week’s presentation was pretty interesting. Not only did I learn about named data networks, I also learned about the current role of Ip and how our internet today revolves around it, as well as the future role of Ip, which is hopefully going to replace the whole idea of network layers and protocols that we currently use. At first, the whole idea behind using this new system of named data networks seemed pretty complicated, but as the presentation continued, I started comparing it to our current internet architecture and then everything started clicking! Named data network, or NDN for short, is actually an easier concept to understand, since the theory is pretty straight forward. At the IP level, NDN packets can be categorized into two different types: interest, and data. They will both contain a name to identify what the user is searching for, but will not contain any sensitive information to promote security. Once the request has been made and a control packet is issued, it will go from one router to the next looking for the information which matches the name. For example, if there are two routers, and the user requests something, the information he requested will be forwarded to a router, which will return the data packet if the name matches the data, or it will simply forward it to another router who may have it. The actual blueprint for how routers will use this NDN to forward data is still under extensive research, but the idea is solid; however that is not what grabbed my full attention. What caught my eye the most was the slides on security and how NDN is trying to implement the idea of using keys to secure data. So the producer digitally signs and encrypts the data using a private key, which none should have. Since that private key was used to encrypt the data, the consumer can trust any kind of data. Just as the private key is used to encrypt the data, the public key can be used to decrypt it. To check if someone stole your private key or the data is malicious, simply try to decrypt it using the public key. If it decrypts, then the data is real and if it does’t, then the data is malicious and the private key was stolen! This idea is so interesting, especially since it completely changes how security in the internet currently works. If this idea is accepted, then the cyber crime rate as well as viruses and hacks are sure to decline and the internet will be a simpler and safer virtual environment. Since week 2 was this interesting, I can’t wait to see what week 3 has in store for me. Goodbye NDN, and hello XIA!

Android Week2 HW

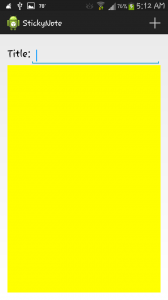
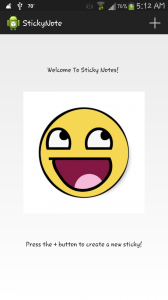
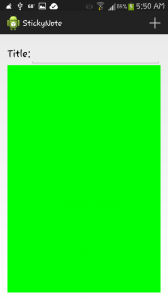
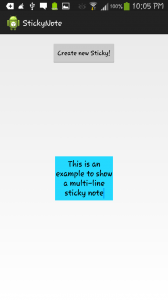
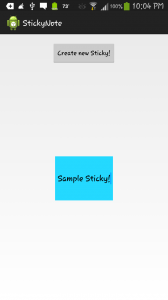
Finally week 2! It’s not easy trying to translate and implement ideas into code especially in Android, but man do I have to say that it was surpassingly easy! Well, the visual aspect of it at least. Since the main focus for week 2 was activities, the action bar and the settings menu, it helped me realize something super important–my app was basically useless. If you recall from week 1, I had a layout where you can create dynamic sticky notes with different colors and write in them, but who wants to have an app that does that? That is exactly what widgets do, and those belong on the home screen. So thinking this way, I came to the conclusion of changing the way my app looks completely and make that 180 degree turn where I can focus more on the user experience rather than content and useless junk. For starters, I used the action bar to display an option where you can click to create a new sticky, added an icon to it and then removed the button in the main layout to make more room. Then, instead of having it create a lot of dynamic stickies I made it so that it only creates one sticky at a time, but the real difference here is that it will cover almost the whole screen and it will have the option to enter a title. Here is the result: Main activityAfter creating this activity, I had the insane idea of creating a splash screen! Even though it will be useless in this specific app, I thought it will be cool to create and so I did. After having created the splash screen, I noticed that it was using a whole activity for basically nothing so I had to come up with a plan. The plan was to try to come up with a way to reuse the same activity, but try to show two completely different layouts. This then led me to the topic of fragments, but fragments was overkill for what I wanted to implement. After thinking some more, I realized it will be easier to simply remove the layout at runtime as soon as the user clicks on the button to create a new sticky in the action bar. I also added a little welcome message along with a little note that provides simple instructions on how to create a new sticky note. This is how my “splash screen” looks like for now:

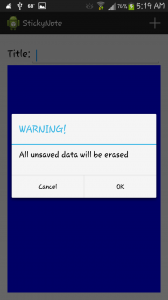
WelcomeAs soon as the ‘+’ icon is clicked, it will check to see if it is the first time running the app. If it is the first time, then it will delete the “splash screen” and create the original layout dynamically, but if it isn’t it will simply overwrite the existing sticky note with a new one. The problem here is that if the user is typing something that hasn’t been saved yet, they will lose all of their work. To try to fix this I created an alert that will popup with a confirmation dialog where the user can either agree or disagree to the conditions. Here, in order to keep it simple, I just added two buttons: one for “ok”, which is to confirm, and the other to “cancel”, which…well is pretty obvious. If the user clicks “ok”, it will overwrite the current sticky with a new one that will have its background color changed randomly. On the other note, if  the user decides to cancel, then it will return to the current sticky note the user was working on. Here are the screenshots:

multi color activityAlert

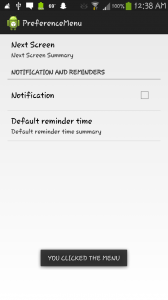
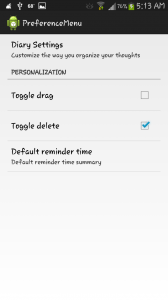
Everything is working smoothly so far, but the app is still pretty plain. I have to add the functionality to delete, save, edit and even open already saved sticky notes! This will have to be inside some kind of menu, but the question now is: “how”? After spending countless hours searching on the internet and asking in forums, I finally learned the concept behind it and I was able to understand the basics. After messing around with some code in the external libraries that were included in my android studio project, I was able  to extend the settings menu. The default menu only had one option, which was “settings”, so I started with that and created a new activity that will be called whenever the user clicks on the settings option. Here is the result: Preference menuThe next screen is a menu in itself, where it will take you to another activity with different options. I created that option in hope for extending my application in the future. I then created a category called “Notification and reminders” to have options where the user can set up reminders and how frequently they want to be reminded of a specific activity or event. After giving it some thought, the idea of using reminders wasn’t really needed, so I decided to change up the whole entire activity. Here is the newly created settings menu:

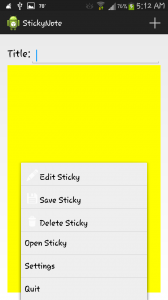
Screenshot_2014-08-07-05-13-29I decided to make the sub menu activity something revolving around the idea of a diary since a diary and sticky notes both involve the action of writing down thoughts and ideas. I also changed the notifications category to personalization. Here, I was hoping to create a building stone for when I decide to create a widget using the toggle drag feature as well as some kind of animation to dynamically create a button on the sticky note itself allowing the user to delete that specific note. After a few trial and errors, I figured that it will be better to toggle some of these features inside the actual menu and not in the settings option; however, I will be leaving the settings menu activity how it is for potential future ideas that may involve it. Putting the settings option aside, the actual menu that shows up whenever the user clicks on the “menu” button, should have the options I said before like: save, edit, delete, open and maybe even a quit button somewhere along those lines. This is where I encountered another troublesome error. According to android, the user cannot have icons next to the actual text of the menu item. This is absurd, especially since i’ve seen many apps using this feature! I didn’t take no for an answer, and continued researching until I found a “hack” to enable to me use this feature. The trick is to use spannable strings and image spans side by side to create the illusion of an icon being displayed next to a menu item. So far my menu looks like this: Settings menu

The only thing left is to darken the icons, create more icons for the last three options and actually make the program do something when you click on them! So far, I just have the graphical aspect to it done, but this can all be done in week 3, especially since week 3 is all about data storage! I’ll finally be able to actually open an actual sticky note that has already been saved, and who knows, maybe I can even display it in a list in another activity. Week 3 is sure to be interesting. I can’t wait!


Mobility First Thoughts

Starting off the day with a good overview of how the internet works as well as how it came into existence is pretty fascinating in itself; however, the true beauty lies in the visual representation of how the internet really looks like! The way the internet looks like on a global scale is so big and complex that it actually resembles the galaxy in a way. Aside from the map of the internet, I really liked how the internet isn’t only software. It was interesting to find out that there are many routers, switches and hubs that connect to one another to produce an internet connection. I was finally able to grasp the basic concept of what goes on behind the scenes every time I connect to wifi. Finally, what caught my interest the most was the idea of spoofing as well as the vulnerabilities and weaknesses that ip addresses have. So far, this mobility first workshop seems to be interesting and I’m glad I took this perfect opportunity to try learn more about the future of the internet. I can’t wait to see what’s next in week 2!

Android Week1 HW

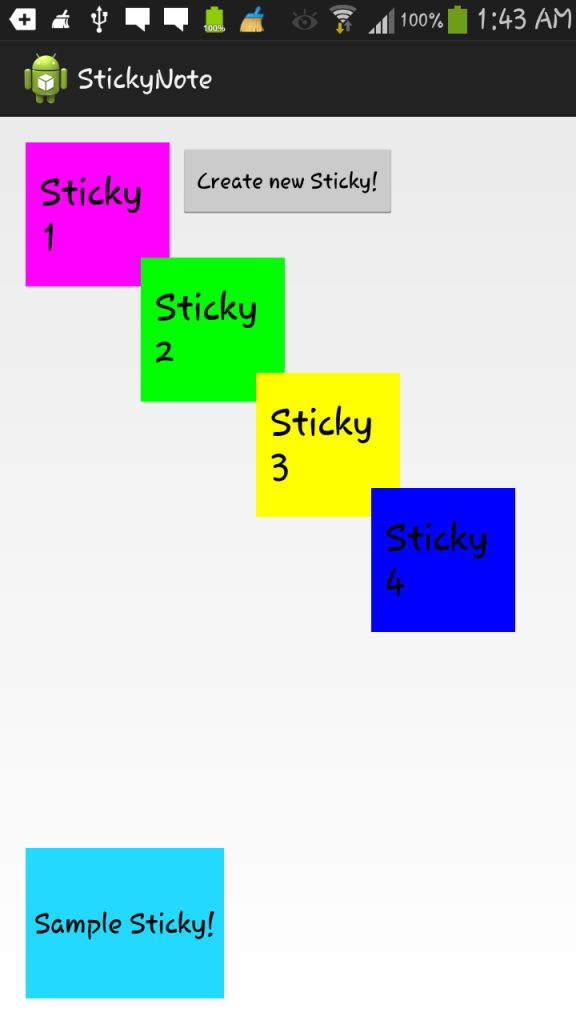
Okay, so for week 1 I had to come up with an idea that emphasizes on the user being able to input a lot of text. Resumes, surveys and application forms seemed way too common, so I decided to create a post-it type of application. Starting off, it seemed really simple…but man, was I wrong! After countless hours of research I came to the conclusion that I am alone. Having just started the transition from C++ to JAVA, I had no idea where to start, and definitely not a clue on how to use the android API to start my own application, and to top it all off, all of the source codes and suggestions I found in different forums and community sites relied heavily on xml; however, for my application I had to use dynamic Java programming. Everything had to be decided at run time, since there is no real way to know exactly what the user wants. Finally at the edge of despair, I randomly got an idea–using EditText views with backgrounds to simulate the ‘effect’ of a post-it note! Okay, so my dim journey towards the goal of completing this almost-impossible app started! To start off, I nested a Frame Layout inside a Relative Layout to create this full screen kind of effect (obviously with the action bar present) and created two views: a Button and an EditText view where users can type into. I positioned the button on the top and the EditText view in the middle and it ran fine.


simple textmulti line text


So far so good, but now I have to make the button create new EditText views every time the button is clicked. Looking through the official android documentation for any ideas on how to implement the code for when a button is clicked, I found some ‘listeners’ that didn’t look that hard to use. Okay, so I tried using a special listener called ‘OnTouchListener’, and then boom! I encountered my first problem. The listener uses anonymous functions! I have never seen that or even heard of it in my entire life. The scoping rules are different as well. After researching and having a better understanding of how anonymous functions work, I was able to somehow make the button create a new TextEdit view. It was created in the top-left corner of the screen and not in the middle like how I wanted to, but hey, at least it worked! After customizing the view by adding highlighting color, text size, view dimensions, and a function that randomly changes the background color, I ran into my second problem! This time, the problem was that when I clicked on the button more than once I just saw it change colors and it wasn’t creating different EditText views…or so I thought. In reality, it actually was, the problem was just that the views were being created in the same exact position. Now I think this was the hardest challenge I ever had to face in my life regarding code because I had to understand advanced concepts in a language I barely knew as well as the algorithmic thinking needed to implement the code and change everything dynamically in such a short amount of time. After 5 days, I finally figured it out and was able to change the position by using the top and left margins of every newly created view.


Various EditText views


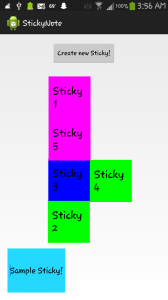
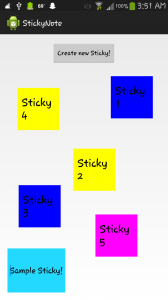
The homework assignment for week 1 ended here, but something about the way the app worked bothered me. After playing around with the code for a little bit, I asked myself: “What if the user wants to select one of the TextViews already created?”. This led me to the idea of being able to drag around every single EditText view. The problem here was that since every view was created dynamically, there was no way to refer to them using the common way of getting the id from an xml file. After looking through the android documentation some more I was able to figure it out quite rapidly, but now a new problem arose: how to use the motion event callbacks that are fired in the touch listener that I had implemented earlier to update the position of every EditText view as the user drags them along. After a whole day of playing around with the code I was finally able to move the views by dynamically creating new layout rules that overwrote the original ones and then adding them to the original layout along with the view resulting in the following screen shots:


moving tetris viewmoving simple view


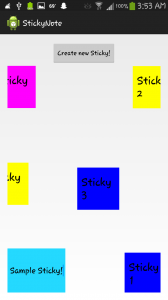
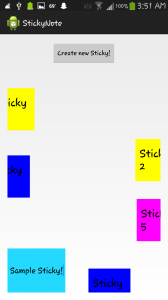
Oh no! Not another error…I already had enough of debugging and dealing with the bugs and glitches android studio has, but little did I know that this problem was the biggest of them all! Just as I was finally happy that the dragging of the views worked, this error had to come along and sweep all my happiness away with this cruel–yet very serious–problem that will drastically affect the way users will treat this program. The problem was that every single EditText view was able to go off the screen! This is horrible and it’s definitely not going to be warmly welcomed by users. After using the little time I had left into researching how to retrieve the device’s screen dimensions, I only found one way but sadly it has been deprecated. There were no other suggestions or tips online nor did I manage to find anything relevant in the android documentation, so I will just leave it like this until I have some extra time after completing the next few weeks worth of homework! With that said, onto week 2 and the wonderful world of creating and switching between activities!


screen dimension errorscreen dimension error 2

Skip to toolbar